Don't Just Patch the Stain: A Brooklyn Homeowner's Guide to Repairing Ceilings After a Roof Leak
It’s a sight that makes any homeowner's heart sink: a brownish, discolored ring appearing on the ceiling. That small stain is a tell-tale sign of a much bigger problem lurking above—a roof leak. In a place like Brooklyn, where our homes face everything from summer downpours to heavy winter snow, a compromised roof can quickly lead to interior damage. While your first instinct might be to grab a can of paint, covering up the evidence won't solve the underlying issue.
Ignoring the source of the leak can lead to more severe problems, including structural damage, ruined insulation, and the growth of unhealthy mold. This guide will walk you through the essential steps to properly address a water-damaged ceiling, starting with the most critical part: fixing the roof leak itself. We'll cover how to assess the damage, understand the repair process, and why a professional approach is the best way to protect your property and peace of mind.
Step 1: Stop the Source Before You Start the Repair
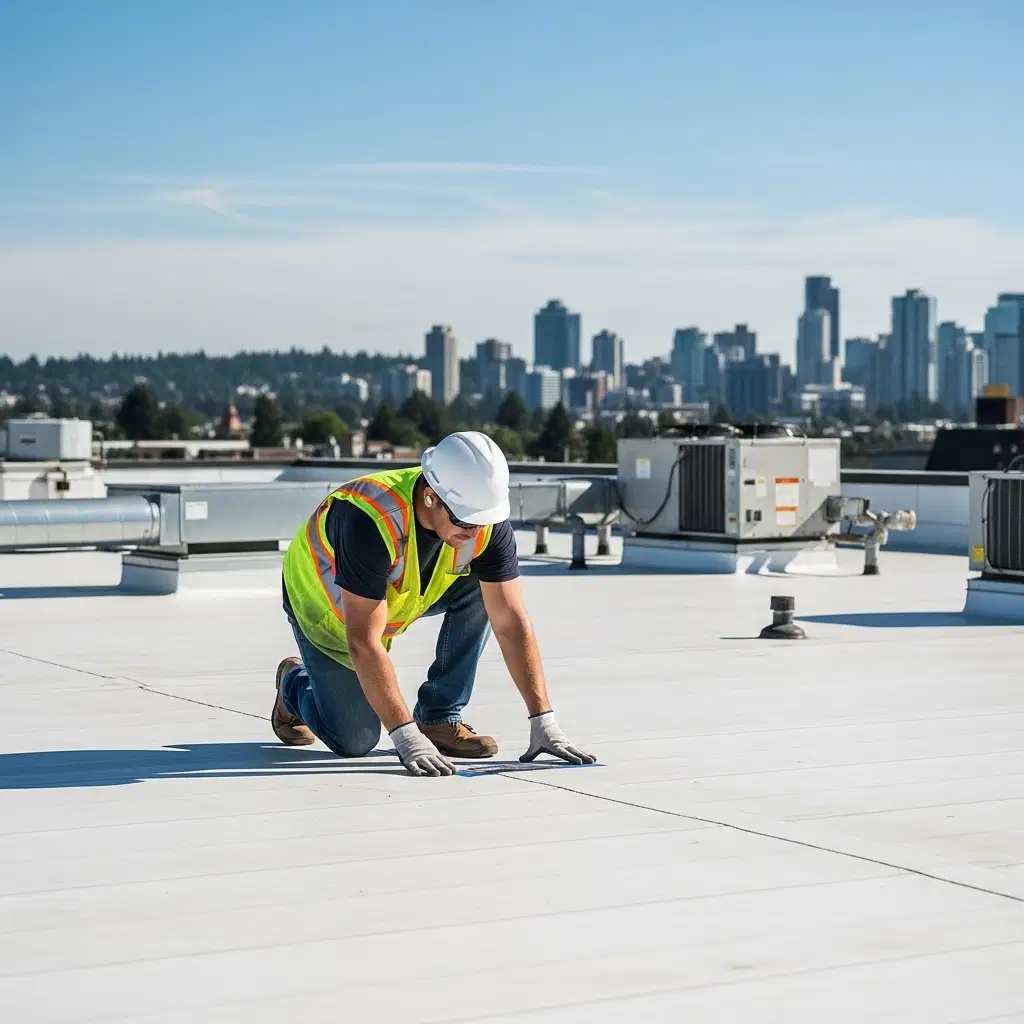
The absolute first priority is to find and fix the leak in your roof. Repairing a ceiling while water is still getting in is a waste of time and money; the damage will simply reappear. A professional roof inspection is the most effective way to pinpoint the source of the problem. Leaks can be deceptive—water can travel along rafters and pipes before showing up on your ceiling, meaning the interior stain may be far from the actual entry point on the roof.
Common culprits for roof leaks, especially on the flat roofs common to many Brooklyn brownstones, include:
- Damaged Flashing: The metal strips around chimneys, vents, and skylights can corrode or come loose.
- Worn or Cracked Roofing Materials: Whether it's aging asphalt shingles or a compromised membrane on a flat roof, materials break down over time.
- Clogged Drains or Gutters: Blockages can cause water to pool on the roof, where it will eventually find a way inside.
- Ponding Water: On flat roofs, improper drainage can lead to standing water that slowly seeps through the roofing material.
Once our team has identified and professionally repaired the source of the leak, you can confidently move on to fixing the interior damage. A comprehensive roofing service not only stops the immediate problem but also helps prevent future issues.
Step 2: Assess the Ceiling Damage and Prevent Mold
With the roof secured, it's time to evaluate the extent of the ceiling damage. The severity will determine the necessary repair method. It's crucial to ensure the entire affected area—including the ceiling joists and insulation above the drywall—is completely dry before starting any cosmetic work. This is the most critical step in preventing mold growth, which can begin within 24-48 hours of water exposure.
Here’s what to look for:
- Minor Discoloration: If the leak was small and caught quickly, you might only have a light stain. The area is likely stable, but it still needs to be treated properly.
- Peeling or Bubbling Paint: This indicates the water has saturated the top layers of the ceiling. The paint has lost its adhesion and will need to be scraped away.
- Sagging or Swollen Drywall/Plaster: This is a serious sign. When drywall or plaster absorbs a significant amount of water, it loses its structural integrity. A sagging ceiling is unstable and must be handled with care, as it could collapse.
If you see significant sagging, it's best to contact a professional immediately. We can safely assess whether the section needs to be replaced and check for any hidden structural damage that isn't visible from below.
Step 3: The Professional Ceiling Repair Process
Repairing a water-damaged ceiling correctly is about more than just aesthetics; it's about restoring the integrity of your home. While a small stain might seem like a simple DIY job, achieving a seamless, professional finish that blends perfectly with the rest of your ceiling is a skill that takes experience.
A professional ceiling repair typically follows these steps:
- Preparation: We begin by protecting your home. Your floors, furniture, and walls will be carefully covered to contain dust and debris.
- Removal of Damaged Material: For anything more than a minor stain, the damaged section of drywall or plaster is carefully cut out. This allows us to inspect the cavity for mold and ensure the area is fully dry.
- Drying and Treatment: If any moisture remains, we use specialized equipment to dry the area thoroughly. An anti-microbial solution is often applied to prevent any future mold growth.
- Replacement and Finishing: A new piece of drywall is cut to fit, secured, and then taped. Multiple layers of joint compound (mud) are applied and sanded between coats to create a perfectly smooth, invisible patch.
- Priming and Painting: The repaired area is primed with a high-quality, stain-blocking primer to prevent the water stain from ever bleeding through. Finally, the ceiling is painted to match the existing color and texture, leaving no trace of the previous damage.
This meticulous process ensures the repair is not only beautiful but also durable and safe for the long term.
Your Trusted Partner for Roof and Ceiling Repairs
A water stain on your ceiling is a clear signal that your home's primary defense—the roof—has been breached. Addressing both the cause and the effect is essential to protecting your investment and ensuring your family's comfort and safety. Trying to tackle these repairs separately or cutting corners can lead to recurring problems and greater expenses down the road.
At Oscar Preview, we provide a complete solution, from expert leak detection and roofing repairs to meticulous ceiling restoration. We understand the unique challenges of maintaining Brooklyn homes, from historic brownstones to modern constructions. Don't let a small leak turn into a major headache. If you've noticed signs of water damage, contact us today for a comprehensive inspection and a free, no-obligation quote. Let us restore your peace of mind from the top down.